File Manager
The File Manager is your firm's home for every file in FileOnion — documents clients submit through requests as well as files your team uploads directly. This guide covers reviewing, organizing, previewing, and managing those files.
What lands here
Two kinds of files appear in the File Manager:
- Files collected through requests — everything your clients upload, carrying their review status (To review, Approved, or Rejected).
- Direct uploads — files and folders your team adds straight to the File Manager. These carry no review status — a file without a status tag is a team upload.
Needs your review
New client submissions surface in a Needs your review queue at the top of the page, grouped by request so eight files read as three jobs. Each row shows the request, the client, how long the files have been waiting (rows older than three days are highlighted), and what's inside.
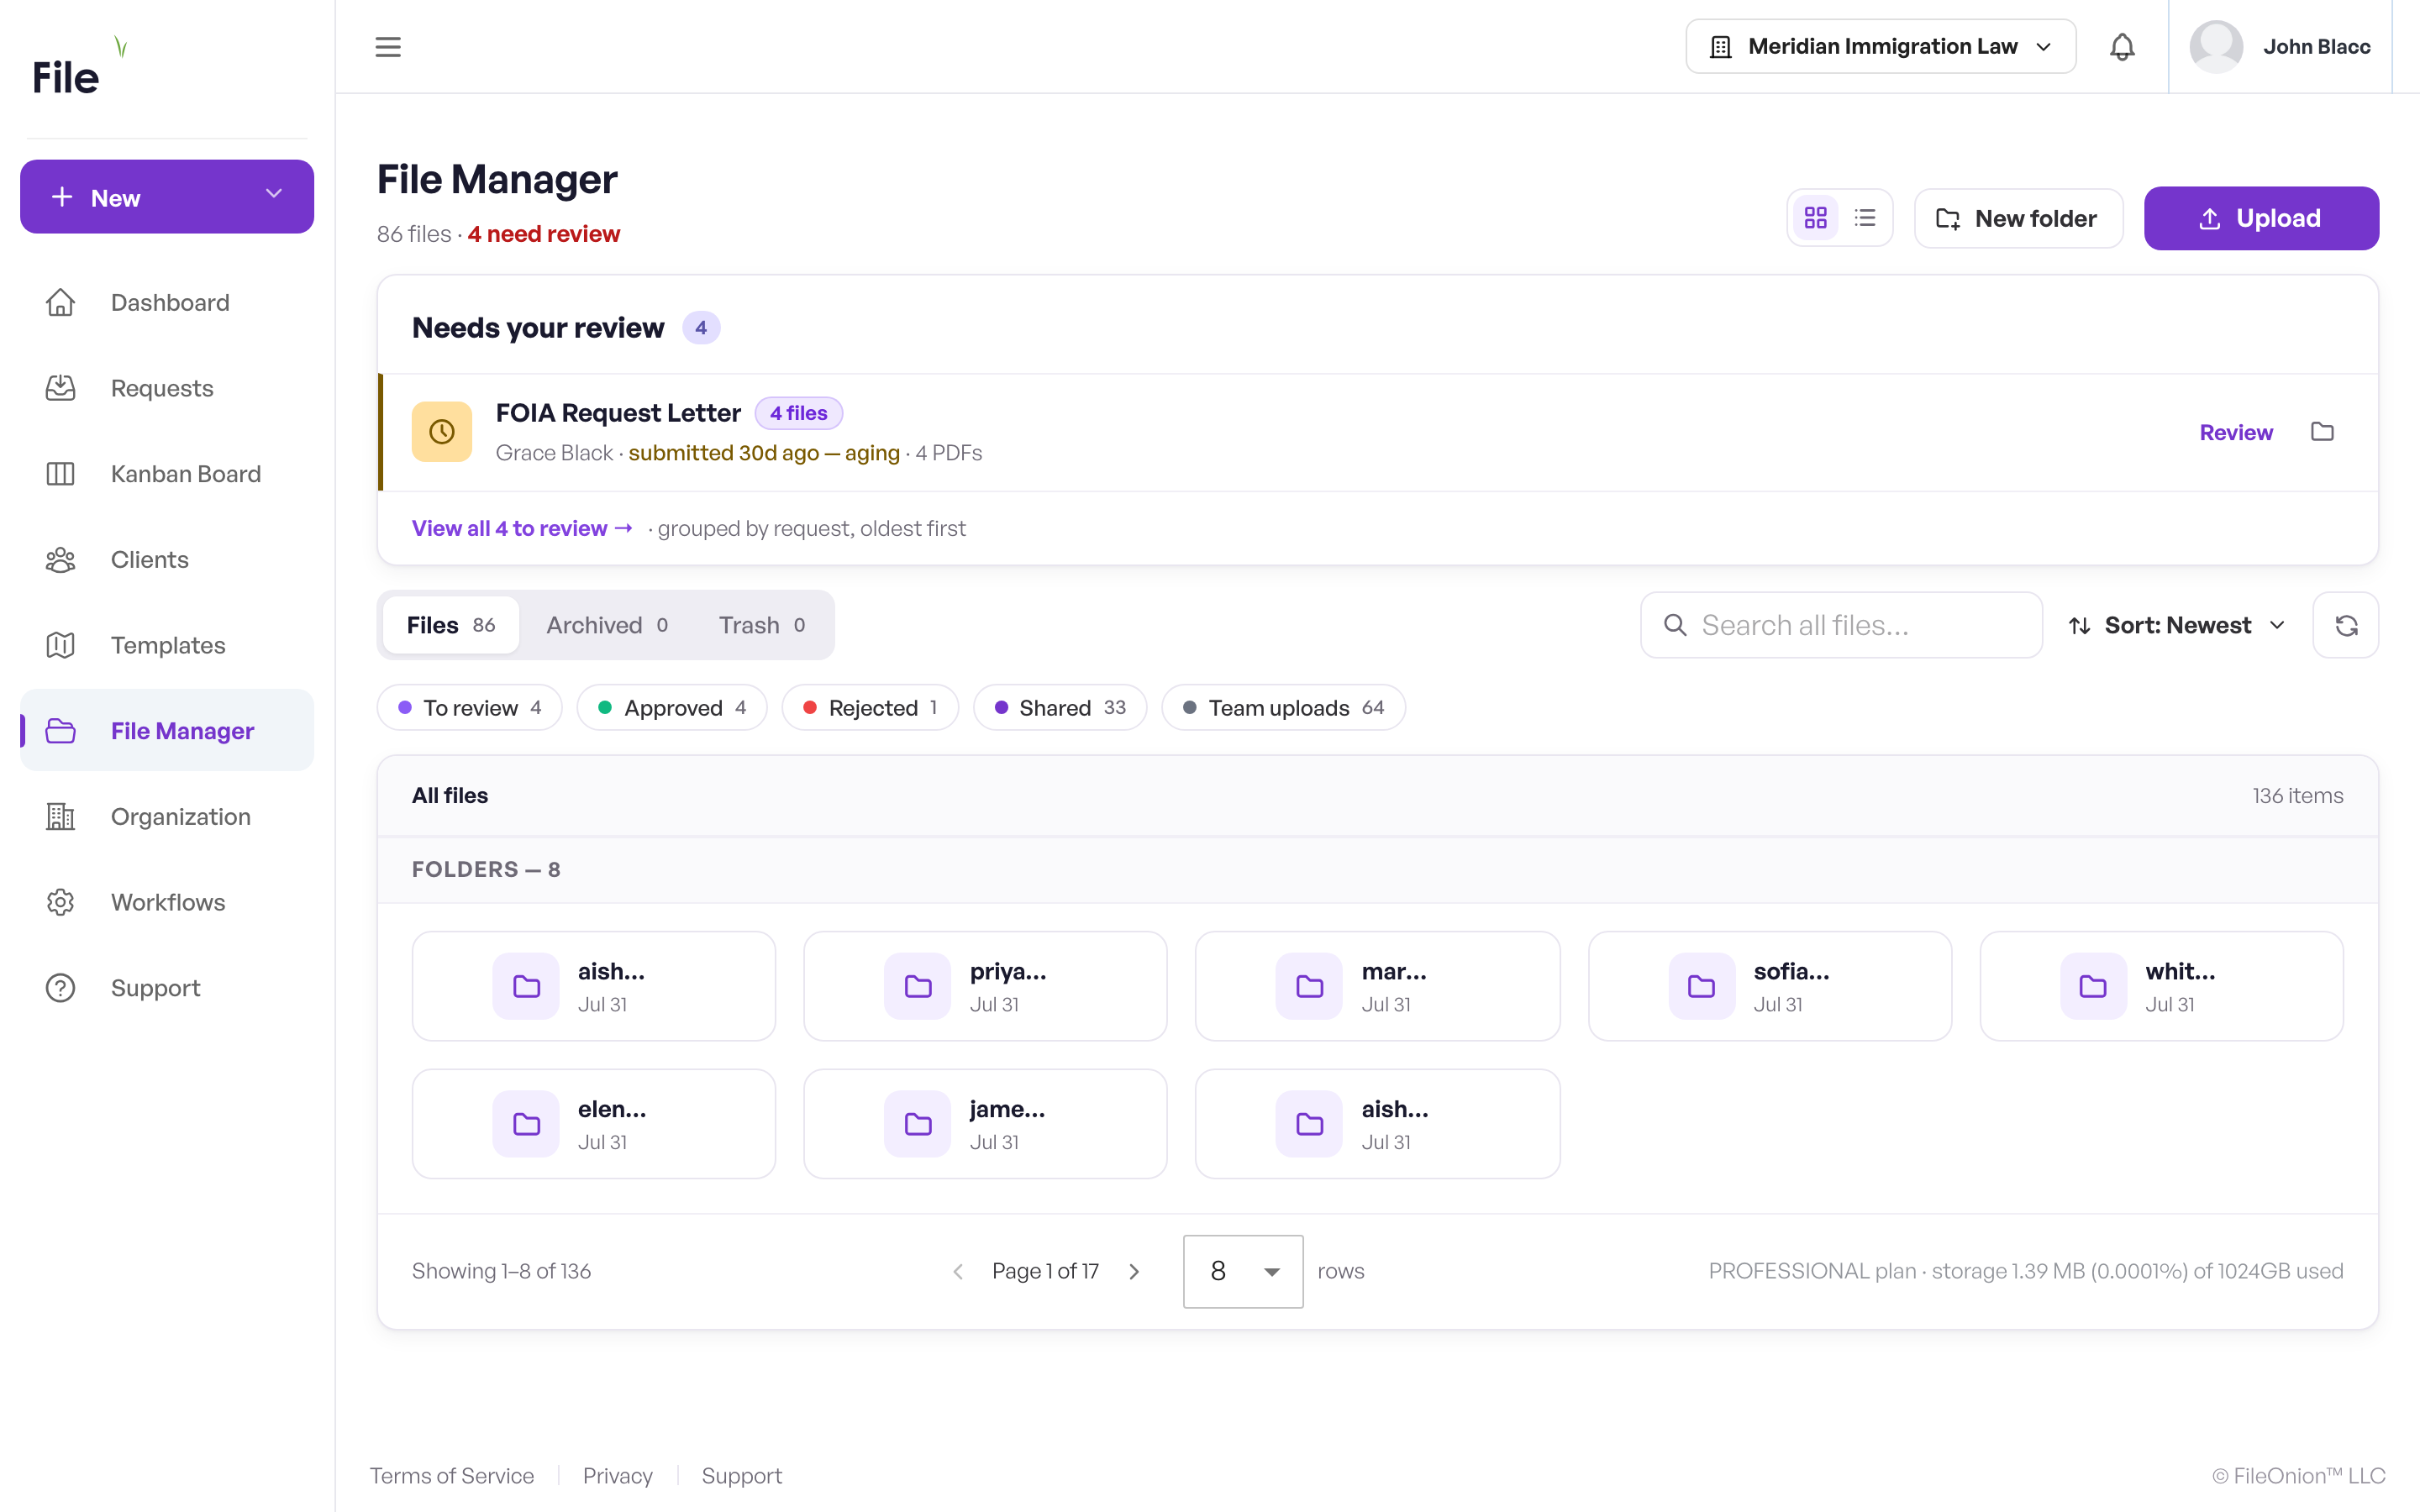
- Click Review to open the first file in the viewer — the arrows step through the rest of the group.
- Click the folder icon to jump to the files' location instead.
- View all … to review filters the file list to everything awaiting review.
When nothing needs review, the queue disappears and the page opens straight into your files.
Sections and status filters
A segmented control switches between three sections:
- Files — your active files and folders.
- Archived — items you archived to reduce clutter.
- Trash — items moved to trash, where you can restore them or delete them for good.
Inside the Files section, status chips filter by review status: To review, Approved, Rejected, and Team uploads (direct uploads with no request behind them). Click a chip to filter; click it again to clear.
Folders and organizing
Click New folder, give it a name, and click Add. Open a folder by clicking it; the breadcrumb trail at the top of the list takes you back up the hierarchy.
Note
Files cannot currently be moved between folders after upload. To keep things tidy, open the destination folder first, then upload into it. For everything else, use pinning, archiving, and tags to keep the list manageable.
Pinned files
Star a file (hover a card and click the star, or use its menu) to pin it. Pinned files appear in a Pinned strip above the list for quick access. Click the star again to unpin.
Grid and list views
Use the view toggle to switch between a grid of file cards and a list of rows. The list view shows each file's name, who it came from (client or Team), last modified date, size, review status, and tags. Your choice is remembered the next time you open the File Manager.
Searching
Type in the Search all files box to search your whole workspace by file name — every folder and section, not just the one you have open. Results show each file's location so you always know where a match lives. Results narrow as you type.
Uploading files
- Click Upload.
- Drag and drop files into the drawer, or click to browse.
- Review the list — remove any file you added by mistake.
- Click Upload.
You can add up to 10 files per batch. Files upload into the folder you have open. Individual file size limits depend on your plan — see Billing.
Checkpoint
Your files appear in the current folder under Files, ready to preview, tag, and organize.
File operations
Open a file's menu (⋮) — or select files and use the actions bar — for these operations:
- View file — open the file in the viewer (folders show Open instead).
- Pin file / Remove from pinned — add the file to the Pinned strip. You can also click the star.
- Rename — change the file or folder name.
- Download — save a copy locally (folders download as a .zip).
- Sync to Dropbox — copy the file to your connected Dropbox account. See Integrations.
- Share / Manage sharing — share the file or folder out to a client (it reads Manage sharing once the item is already shared). See Sharing files with clients.
- Archive — move the item to Archived. Use Unarchive there to bring it back.
- Move to trash — send the item to Trash, where you can later Restore it or Delete forever.
Selecting files (hover a card or row and tick the checkbox) turns the control bar into a selection bar with bulk actions: download, archive, trash, Share, or Unshare the selected items together — in Trash, restore or delete forever. Select all in that bar extends the selection to the whole listing, and a refresh button re-fetches the latest records.
Previewing and reviewing files
Click a file to open it in the full-screen viewer. It shows one file at a time with a counter (for example "4 of 19") — the arrows step through the same files you were browsing, so you can work through a folder or the review queue without going back to the list.
For client-submitted files, Owners and Admins can Approve or Decline right from the viewer's top bar (declining asks for a reason, which the client sees as a comment), and Undo a decision that's already been made. Direct team uploads show file actions instead.
Depending on the file type you can zoom, print, scroll through pages (PDFs), and download. Supported types include common images (JPEG, PNG, GIF, WebP, BMP, SVG), PDFs, and office documents (Word, Excel, CSV). Unsupported types show a "not supported" message — download the file to view it locally.
AI summaries
For supported types — images (JPEG, PNG, WebP, GIF, BMP, TIFF) and PDFs — FileOnion can summarize and tag a document for you:
- Open the file in the viewer and switch to the Details tab.
- Click Generate under AI Summary (beta).
- A Summary and suggested Tags are generated.
Tags appear in the list view, making documents easier to scan. AI summaries are firm-side only — your clients never see them — and they do not count against your monthly AI review allowance.
Not the same as Auto review
AI summaries are something you ask for, on any file. Auto review is something that happens by itself when a client uploads a file into a request, checking it against that document's checklist. Auto review is metered; AI summaries are not. See Auto review vs. AI summaries.
Who can see a file
Files collected through a request inherit that request's visibility. If a request is limited to a team, kept private, or shared with specific people, only those people can open or download its files — a teammate without access to the request will not be able to open the file. Owners and Admins can access all files. See Teams & Sharing for how visibility works.
Sharing files with clients
This is different from request visibility, which controls who on your team can see a request's files (see Teams, Assignment & Sharing). Here you share a firm file out to a client, who then sees it in their portal.
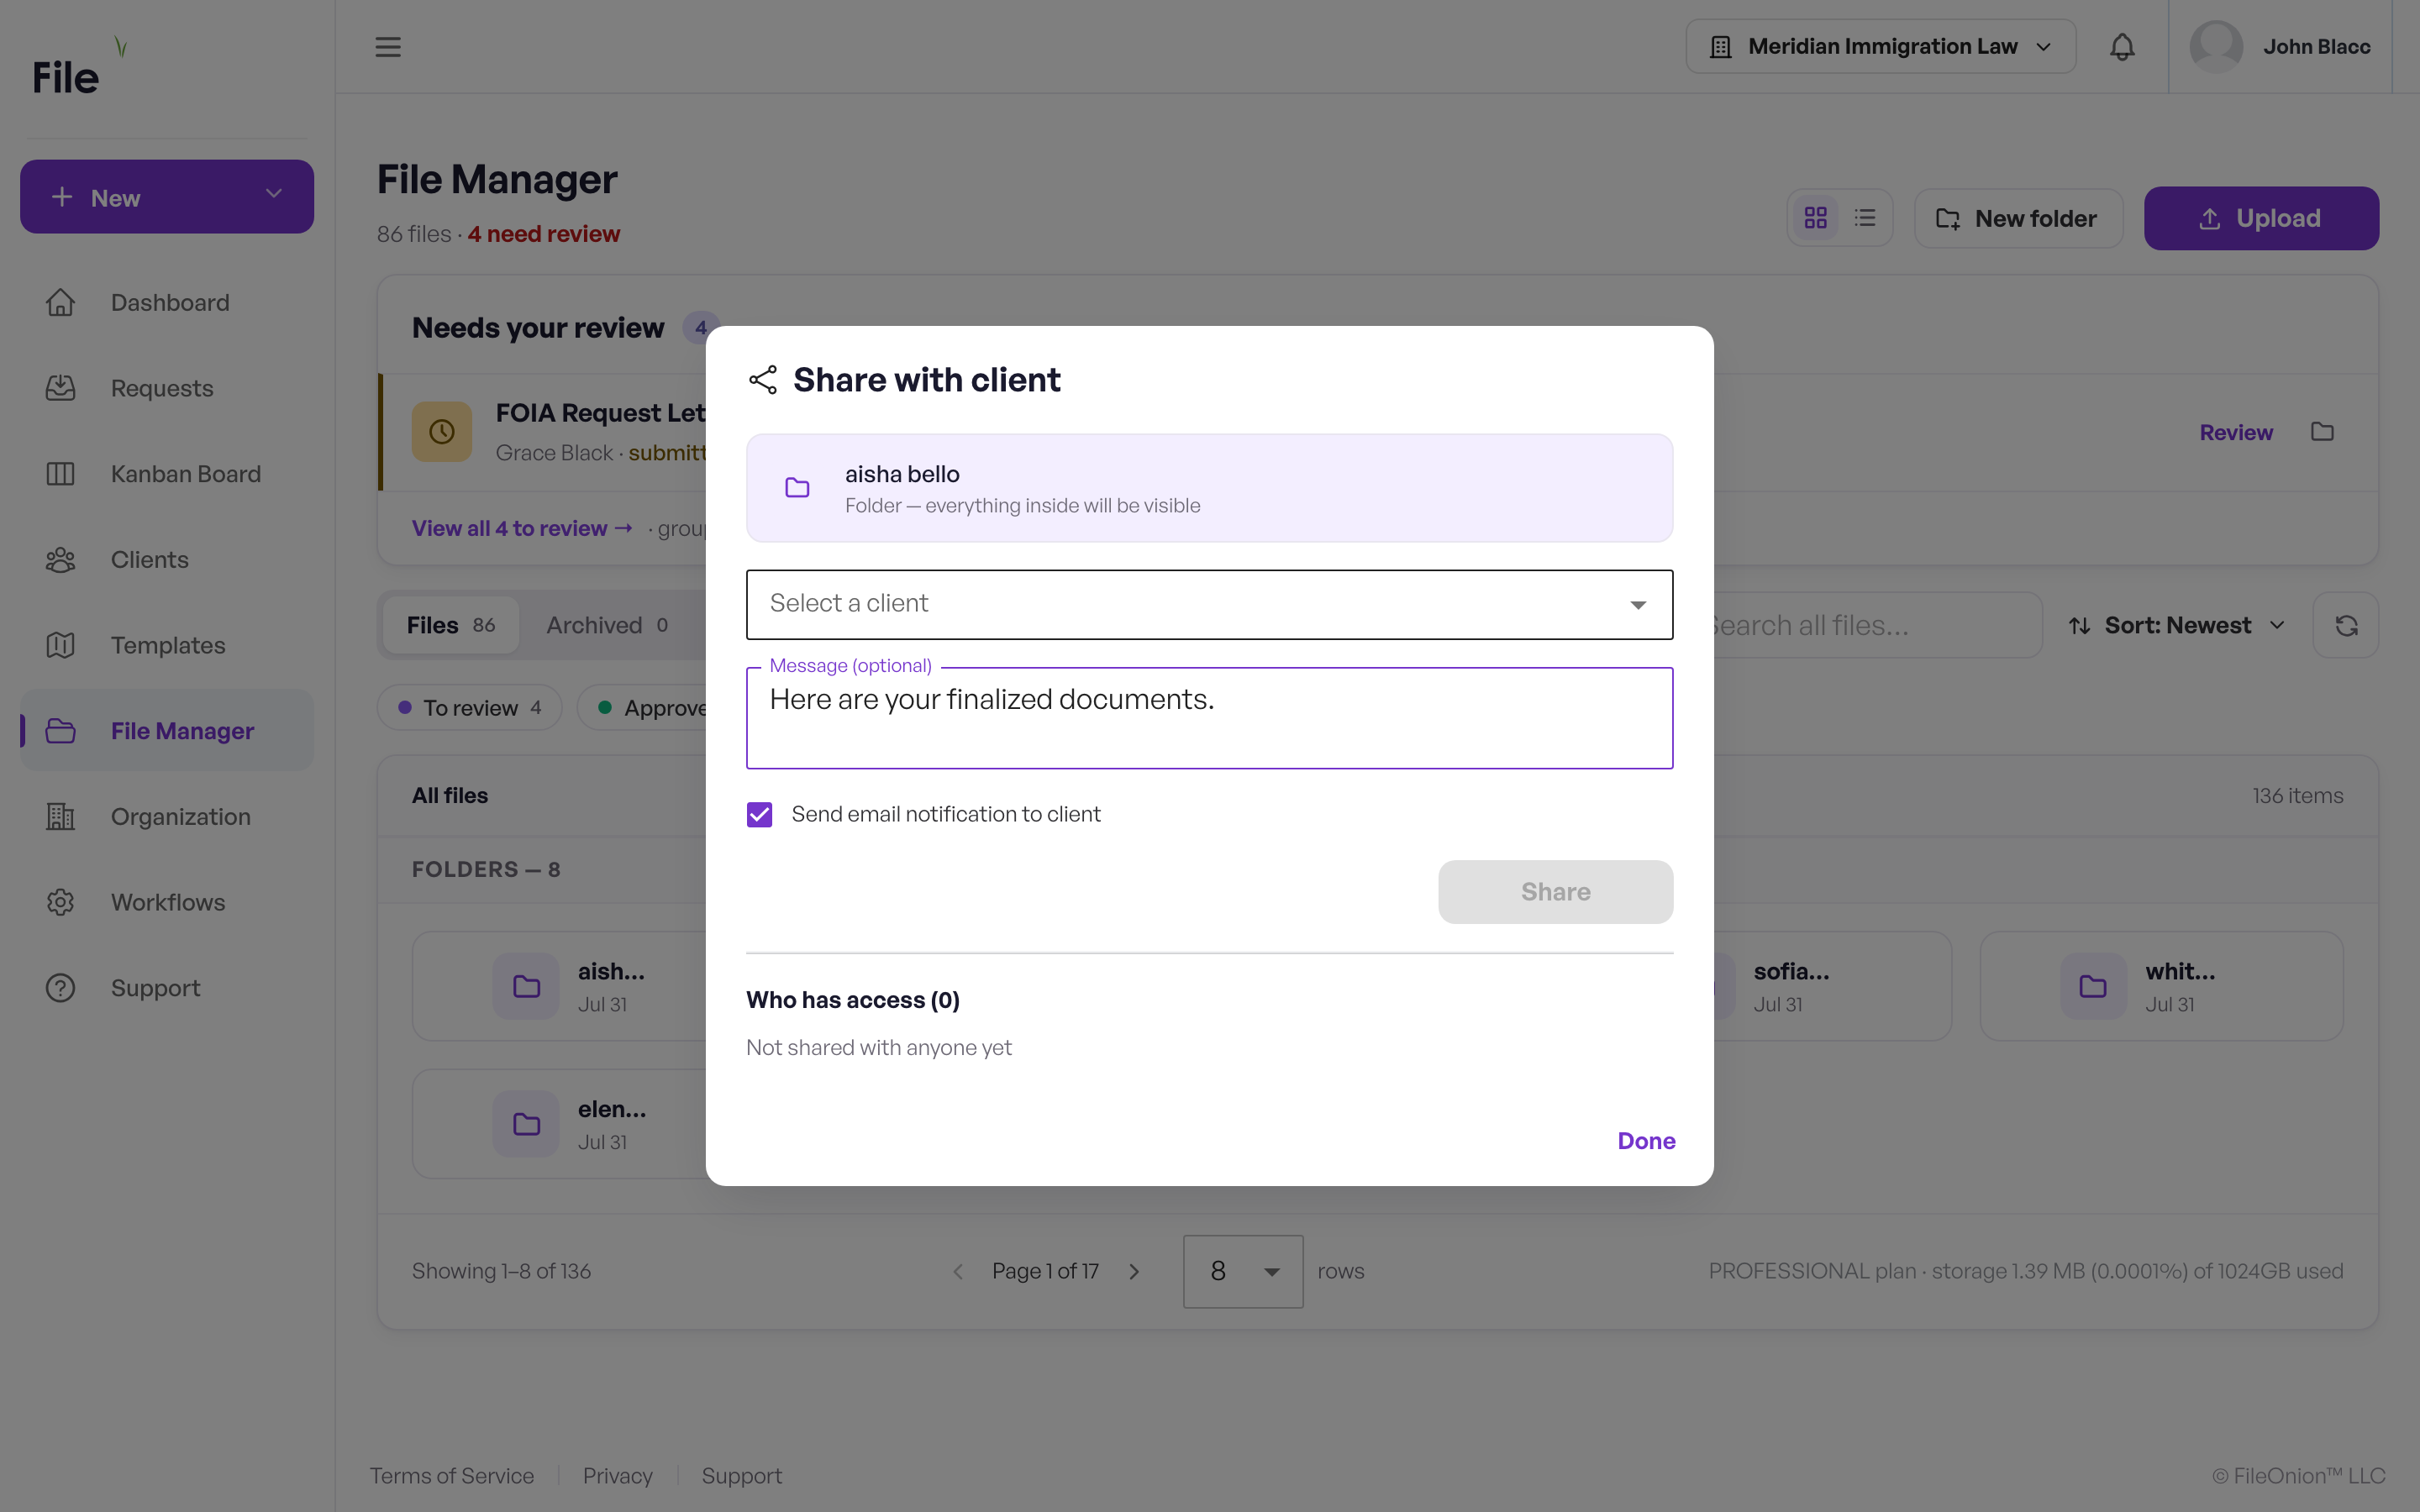
- Share a file — open a file or folder's kebab menu (⋮) and choose Share (it reads Manage sharing once the item is already shared), or select several items and use the selection bar's Share.
- The Share dialog — pick recipients from the multi-select client picker (share with several clients at once), add an optional message (up to 2000 characters), and leave Send email notification to client checked to notify them (it's on by default). Click Share. Sharing is idempotent — re-sharing the same file never creates duplicates. If every recipient you picked is a phone-only client, the checkbox is replaced by a line telling you what happens instead — "This client receives text messages, not email — shared files will appear in their portal" — since there's no mailbox to notify.
- Who has access — the dialog lists one row per client the file is shared with. When you shared several files at once, each row shows "N of M items" coverage. A trash/revoke icon removes that client's access.
- Unshare in bulk — select shared items and click Unshare in the selection bar; a confirmation notes the clients will no longer see them in their portal.
- Shared badge — shared files show a badge on their card or row.
Comments on files
The viewer includes a Comments tab in its sidebar. Use it to discuss a file with your team — for example, to note why a document was declined or what is missing. Participants are notified of new comments.