Clients
Clients feature allows users to create and manage new clients in the FileOnion app. With the Clients feature, users have the ability to perform tasks such as creating new client profiles, providing relevant information about the clients, and managing their interactions within the app. This feature helps users organize and keep track of their documents and clients more effectively.
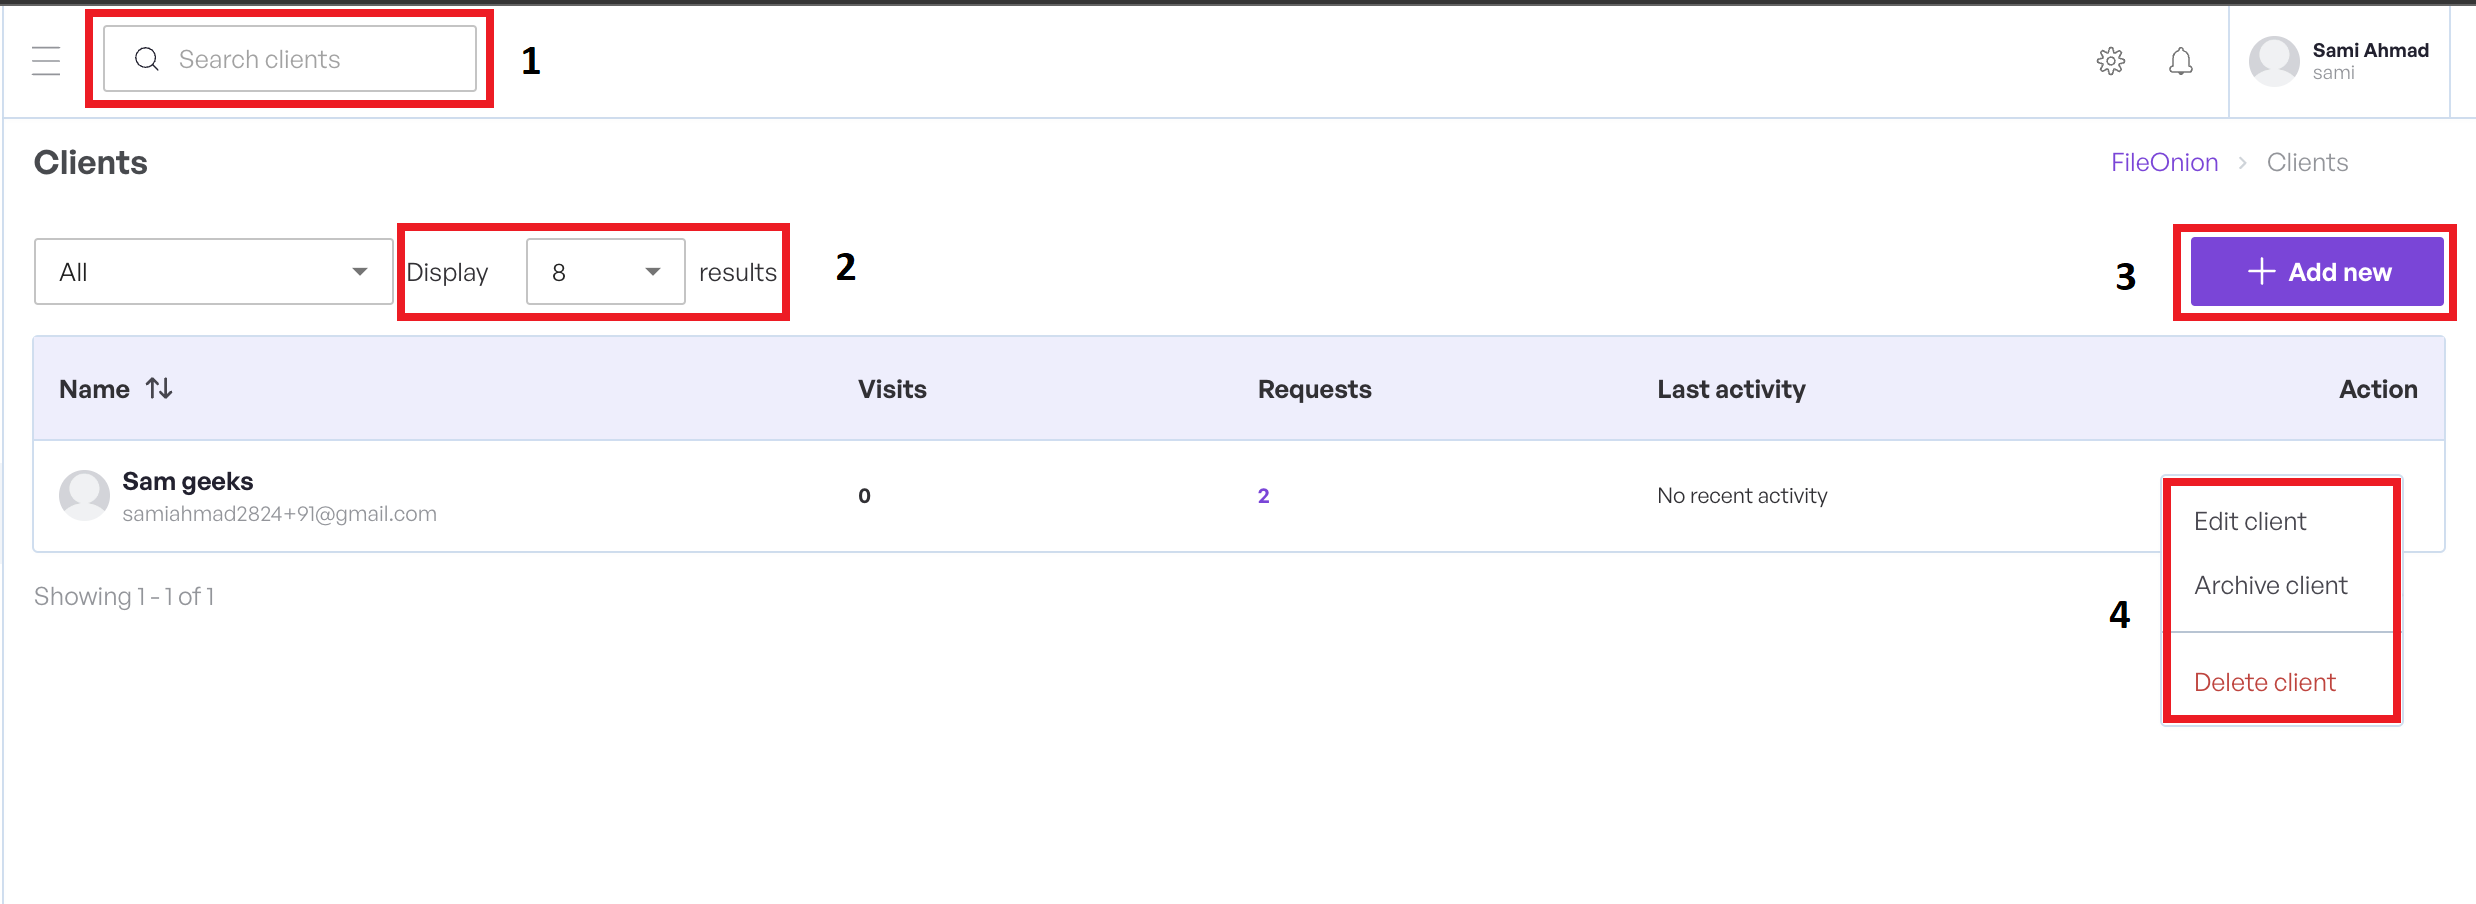
- Enter any search phrase in the search box to filter.
- You select a number, it will display a list corresponding to the number you provided.
- We can create a new client.
- Click the three dots to open the context menu that allows Edit client, Archive client and Delete client.
Search Client

- Enter any search phrase in the search box to filter. The records are automatically filtered as you type.
New Client
Click the Add New button to open a new screen as shown below.
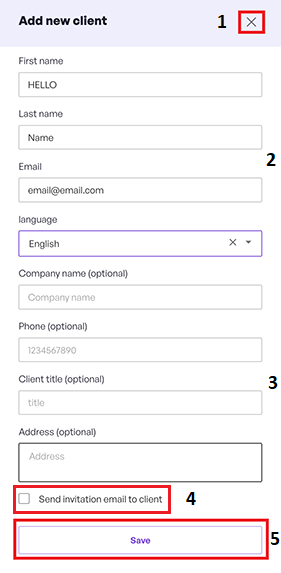
- Click X to close this screen without saving any changes.
- Fill in the relevant information against First name, Last name, Language and Email.
- If needed, you can fill information in optional fields of Phone Number, Client title, Company name and Address.
- Enable this checkbox to trigger the sending of an invitation email to the client.
- Click the Save button to save the client information.
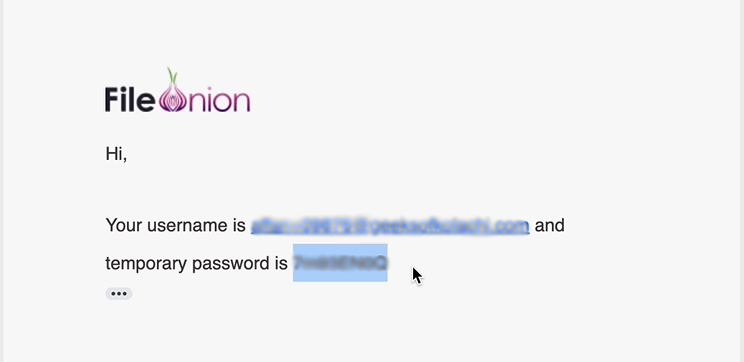
After creating a client, we send credentials to their email so that the client can log in and check their status.
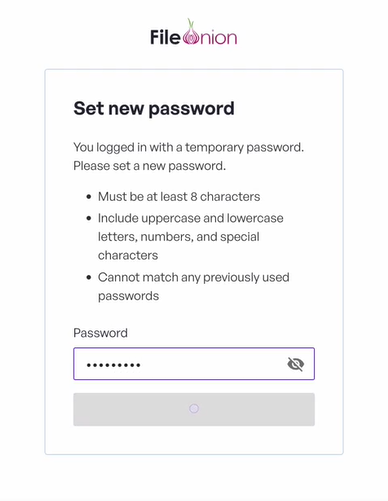
Set New Password
After logging in, you will be directed to a screen where you can set a new password, allowing you to create a new password as well.
Client Dashboard
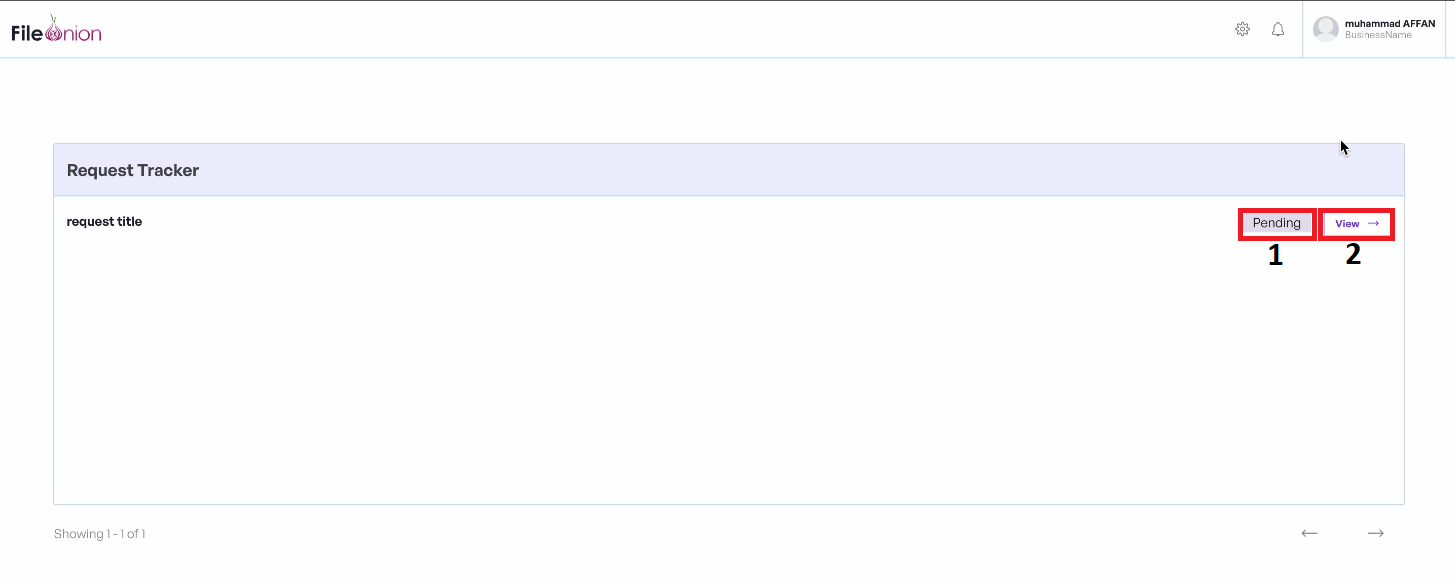
- We can see the status.
- By clicking the View button, we can see the request details.
View Request
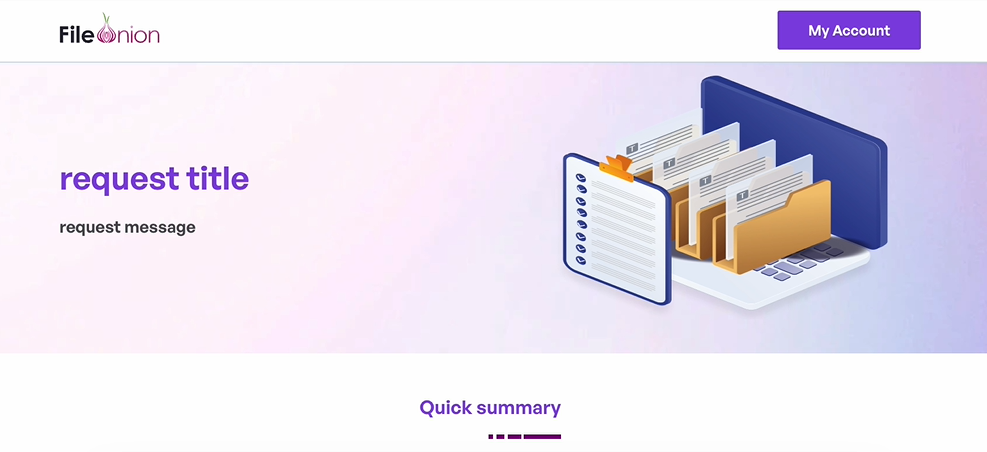
-
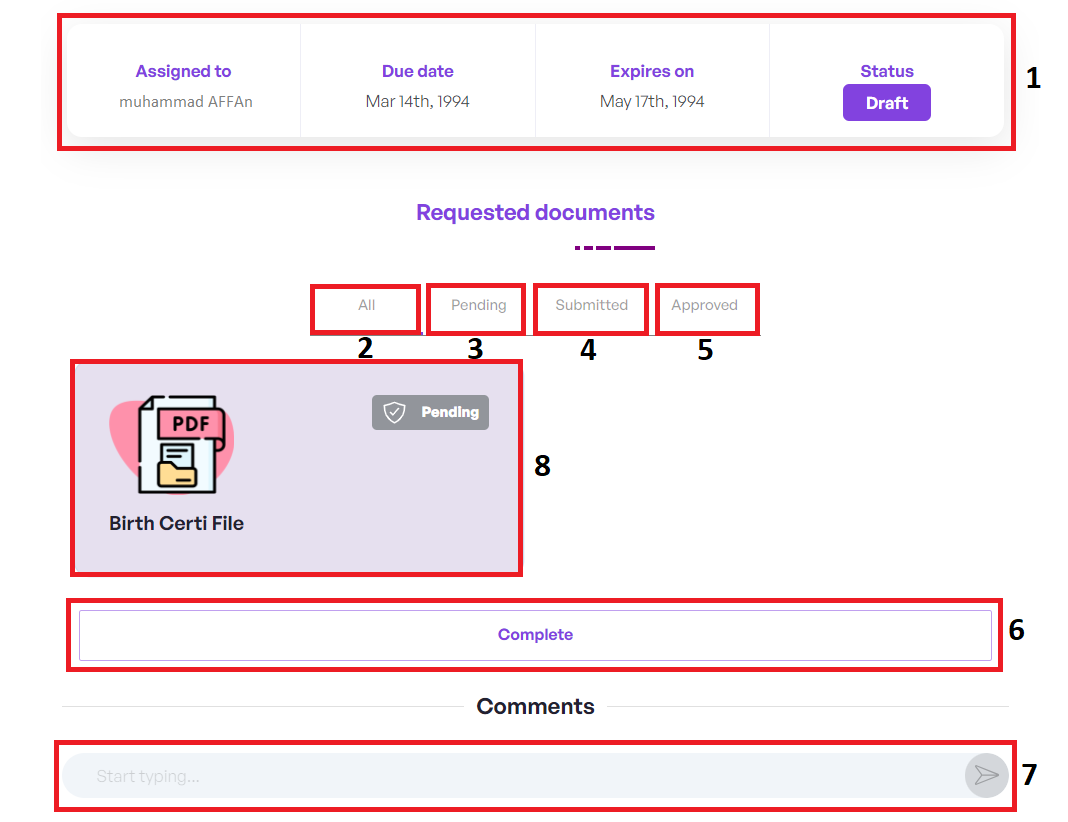
We have in Quick summary Assigned to, Due Date,Expires and Status.
-
ALL: Lists all requested documents.
- Pending: Documents awaiting submission or approval.
- Submitted: Documents already submitted for review.
- Approved: Documents successfully reviewed and accepted.
- Select this option to formally approve the document request once the user has satisfactorily completed the submission process.
- This section serves as a platform for comprehensive discussions, queries, or requests related to files or the project at hand.
- Click on the files to open them, which opens a drawer for easy access.
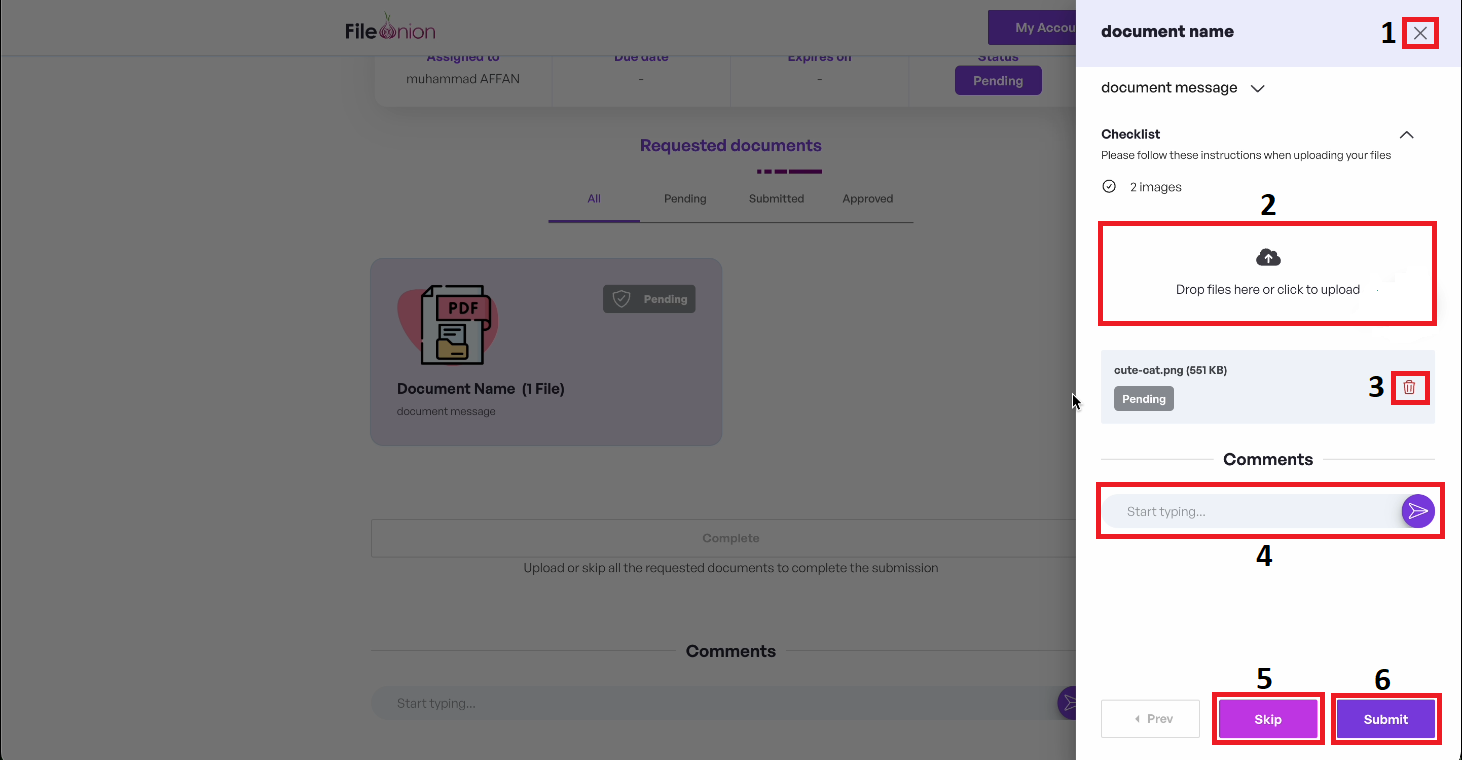
- Click X to revert to the previous screen.
- We can upload documents.
- We can delete documents.
- The comments section for collaborative feedback, to enhance the quality and accuracy of our document review process.
- We can skip to return to the previous screen.
- We can submit to return to the previous screen.
Preview Client Request
Click the client record from the list to open a new screen as shown below.

- To update the client profile picture, click the pencil icon next to the picture.
- To delete the client profile picture, click the trash icon.
- To edit the record, select Edit option.
- To archive the record, select Archive option.
- To delete the record, select Delete option.
Preview Client Documents
Click the client record from the list to open a new screen as shown below.
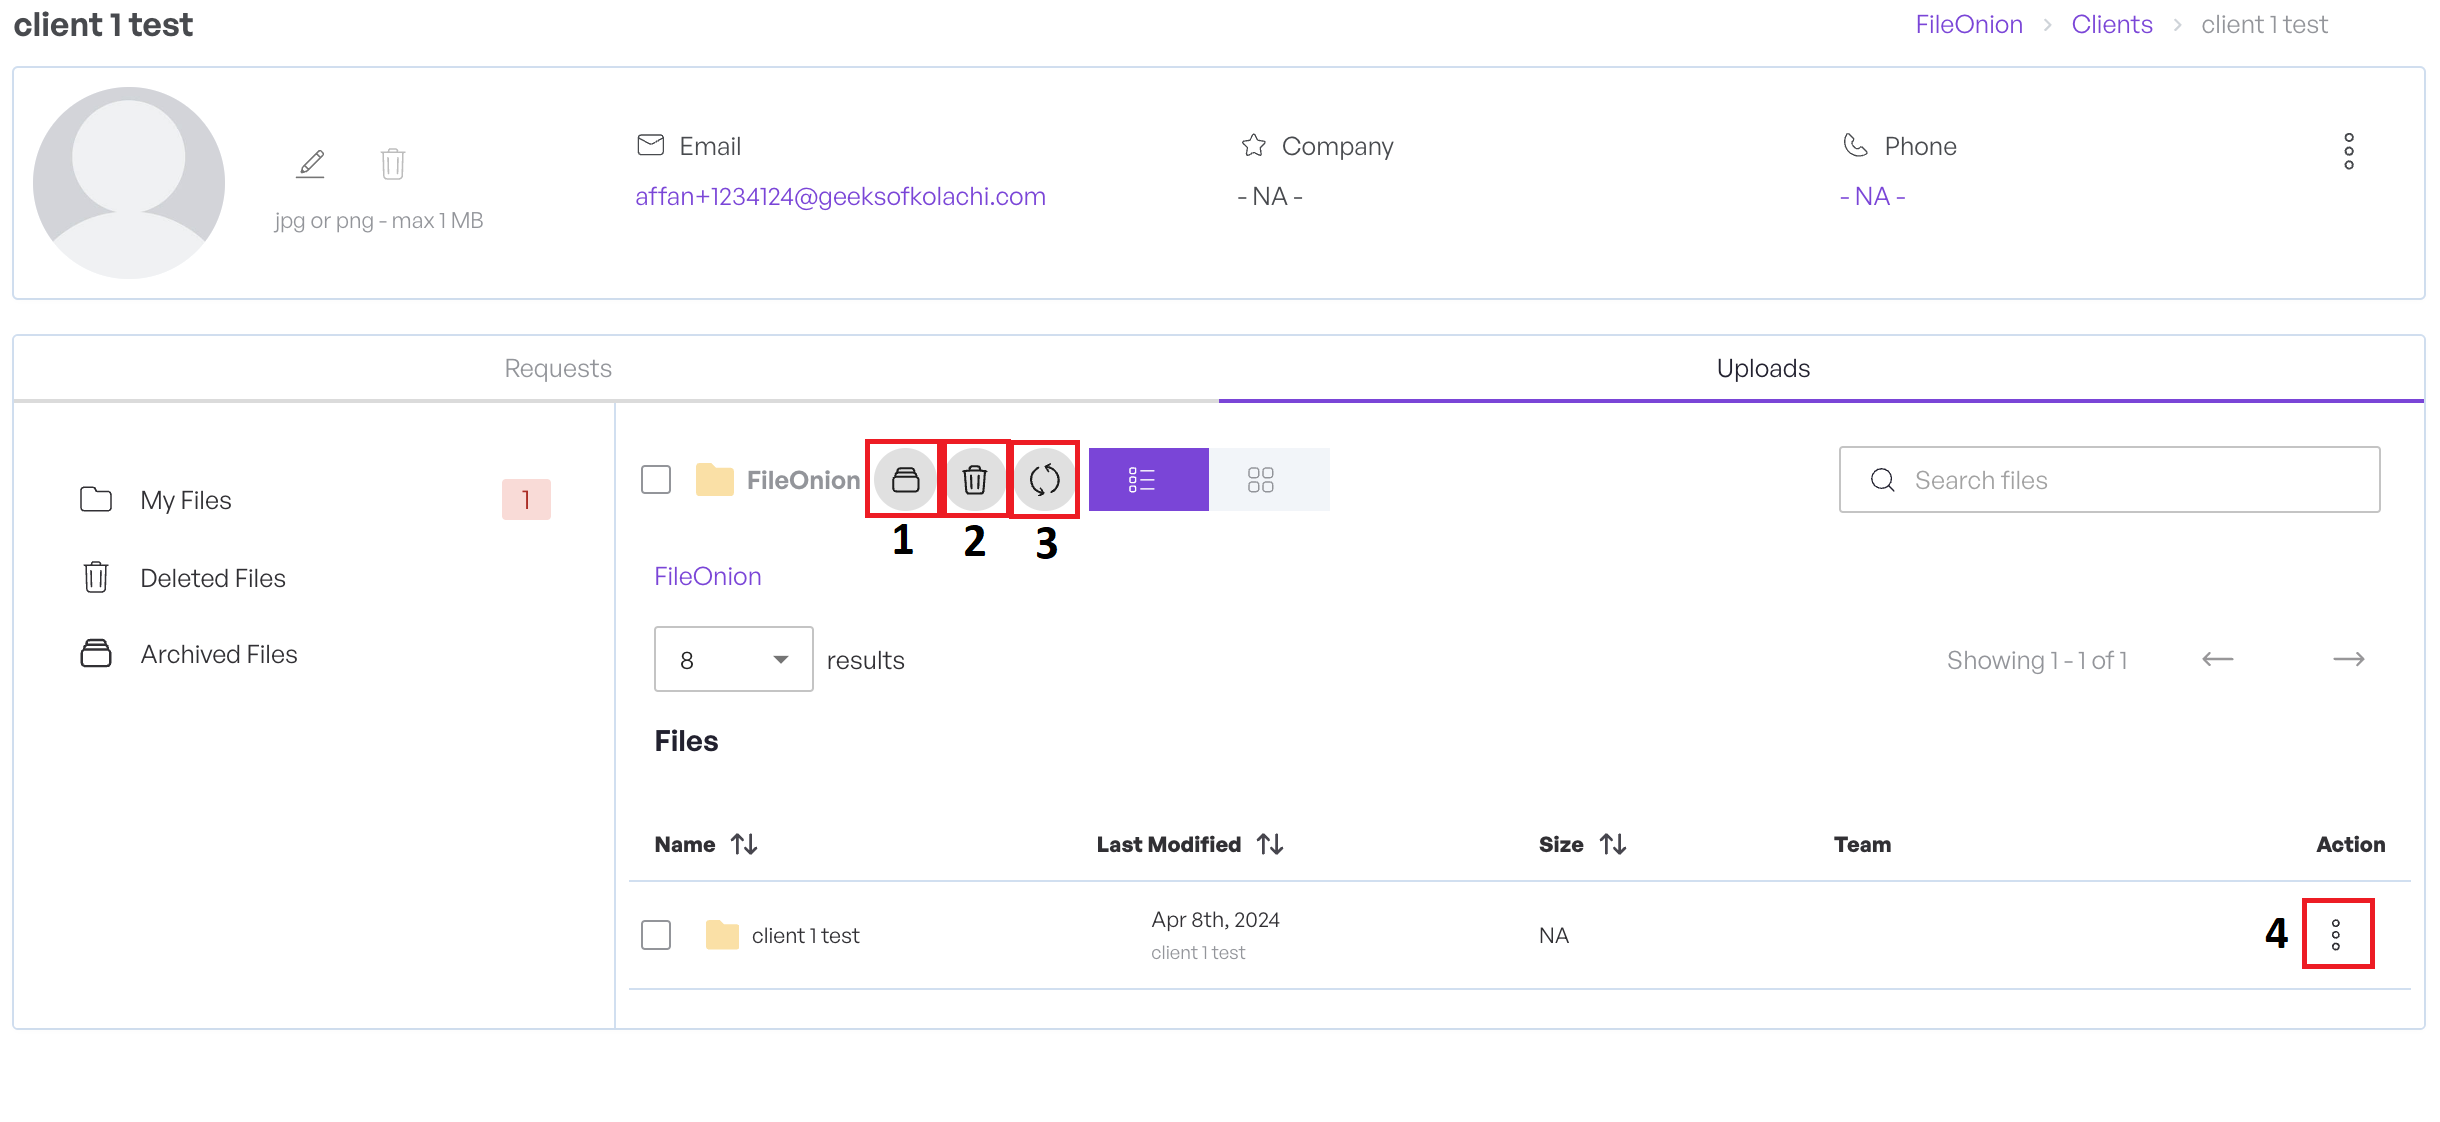
-
Click the Archive file button to move the selected file to archive. Choose either from the menu or select the button to perform archive operation.
-
Click the Delete button to delete the selected file. Choose either from the menu or select the button to perform delete operation.
-
To fetch and display all records now, Click the Sync button.
-
Click the three dots to open the context menu that allows Open file , Add to fav, Sync to dropbox, Archive, Rename and Move to Trash.
Edit Client
Click the edit option from the context menu to open a new screen as shown below.
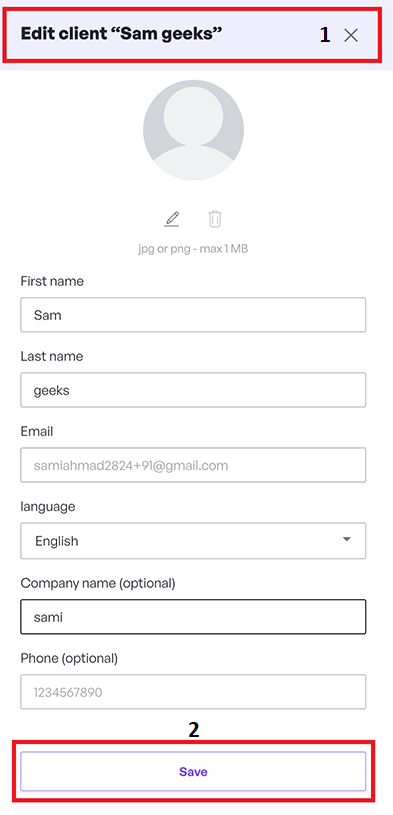
Update the information as required.
- Click X to close this screen without saving any changes.
- Click Save to save the client and close this screen.
Delete Client
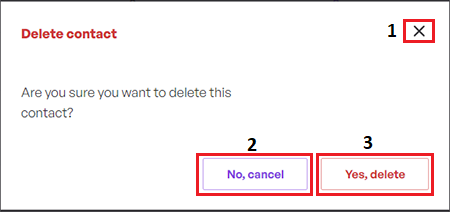
- Click X to close this modal without saving any changes.
- Click No, Cancel button to close this modal without saving any changes.
- To delete, click the Yes, delete button.